Introduction
Hey friend! So you’re curious about how to prep garden soil with an electric tiller? Pretty awesome—you’re about to unlock a smoother, quicker way to build a thriving garden bed. Whether you’re starting fresh or rejuvenating what you’ve got, this guide will walk you through each step—safe, easy, and with that happy satisfaction of turning crusty earth into fluffy, fertile soil.
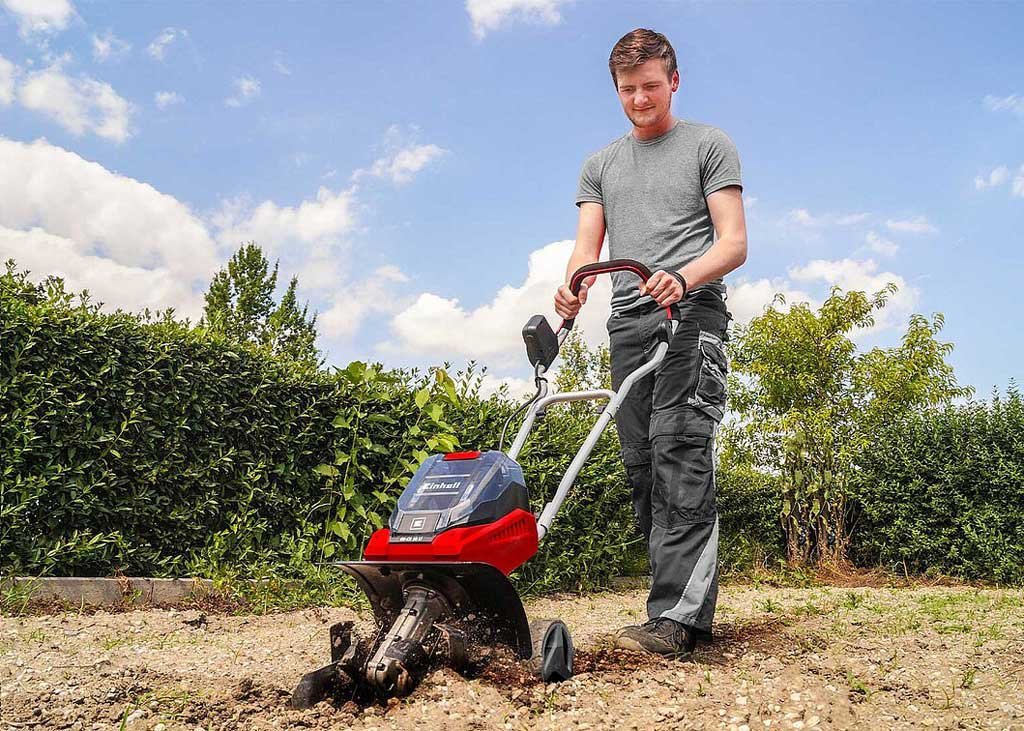
I’ll break it down step‑by‑step, add in some expert insights and pro tips, and throw in just enough casual convo to keep us connected. Ready to dig in? It’s so satisfying when the tines slice through compact ground and you feel that hum of the tiller—it fills you with pure gardening joy!
Why Choose an Electric Tiller
Benefits over manual digging
Well, using a shovel or garden fork is traditional, but it’s slow, back‑breaking stuff. With an electric tiller, you get soil aeration and weed uprooting two to three times faster—and without the aches. You save energy and time, and you end up with soil that’s better mixed and ready for planting.
Advantages vs. gas or battery cultivators
Electric tillers—especially corded models—are quiet, lightweight, and start instantly with just a switch. No fumes, no heavy engine to maintain. Battery models offer portability but can lack power for really tough or clay‑heavy soils. They’re simpler to handle and great for small to medium beds.
Ideal situations for electric tillers
Planning a new garden plot? Reworking a fallow corner? Want to mix compost fast into a raised bed area? Electric tillers shine in those scenarios. If your soil is only moderately compacted, and you’re not working on a massive field, they’re efficient, effective tools.
Planning and Safety Before You Till
Assessing moisture and soil condition
Grab a handful of dirt. If it forms a ribbon that bends but doesn’t smear—perfect. Too sticky? It’s soggy, and tilling will compact it. Too dusty? It’s too dry—moisturize it a day before. Ideal soil is crumbly, slightly damp—easy for tines to penetrate without clumping.
Clearing debris, weeds, and obstacles
Before you even plug in: remove rocks, sticks, sod, and weeds—roots included. These can jam tines or damage the machine. Big value step—not optional.
Outlining your garden bed
Use string, mulch lines, or stakes to mark the bed boundaries. Helps you till straight rows and avoid tilling paths, plants, or lawn edges accidentally.
Choosing between corded vs. cordless
- Corded: Steady power, no range limits (within cord reach), great for larger or clay‑heavy plots.
- Cordless (battery): Portable, no cords, but limited run time and less torque on tough soil. Choose based on garden size and soil condition.
Safety gear and precautions
Wear gloves, close‑toed shoes or boots, safety goggles or glasses, and long pants. Tie back long hair. Keep kids and pets well away. Never work with corded tools in wet conditions. Always unplug or remove the battery before cleaning or adjusting.
Preparing Soil with an Electric Tiller: Step‑by‑Step
First pass: breaking compacted ground
Start at the edge, wheels on transport position. Switch to till on shallow depth (about 3–4 inches) if soil is tough. Engage tines, and let it pull forward gently. Don’t push—you’re guiding, not fighting. Walk slowly and keep your grip firm.
Multiple overlapping passes and depths
After a first shallow pass, increase depth (6–8 inches) and run perpendicular passes over the same area. The overlap ensures uniform aeration and soil lifting. If soil is very hard or clayey, stay shallower and do multiple passes rather than force deep.
Soil aeration and structure improvements
Breaking ground with the tiller improves soil structure, promoting root penetration, air exchange, and drainage. You’re laying the foundation for healthy root systems.
Adding organic amendments
Once the ground is loosened, spread 2–3 inches of compost, well‑rotted manure, leaf mold, or organic mulch over the surface. If clay soil, consider mixing in gritty sand or rice hulls for improved drainage.
Mixing amendments with the tiller
Run the tiller at shallow depth once more (2–3 inches) to fold the amendments into the topsoil. The goal: a fine, friable texture that’s nutrient‑rich and plant‑nutritious.
Final leveling and smooth bed preparation
Use a bow rake or garden rake to break up remaining clods and level the bed. Smooth surface ensures even water absorption and planting depth. Step lightly—you don’t want to compact the freshly tilled soil.
Letting soil settle and final check
Give the soil a day or two to settle before planting—or else plant immediately if weather is dry. This rest period lets large air pockets collapse and soil condition stabilize.
Pro Tips & Community Insights
Avoid over‑tilling and preserve soil biology
Over‑tilling disrupts earthworms, microbes, and soil structure. Minimal disturbance is usually better—limit yourself to one or two tilling sessions before planting. Several gardeners suggest that after rebuilding soil health, no‑till or broad-fork methods can maintain structure more gently.
Tilling clay or rocky soil effectively
Community wisdom: electric tillers often bounce or skip on virgin clay ground. Best to do several light passes at different angles, clearing rocks beforehand. Multiple shallow cuts work better than one brutal deep one.
Addressing common issues & troubleshooting
-
- Tine jamming: Stop, clear weeds or roots manually.
- Tiller bogging down: Likely soil too wet or too dense; wait a day or try shallower pass.
- Uneven depth: Slow your pace, adjust wheels/depth.
- Cord caught or snagged: Never plow over extension cord—keep it behind or to the side safely.
Maintenance of your electric tiller
After use, clean dirt and plant debris from tines. Lubricate moving parts if the manual says so. For corded models, inspect the cord; for battery units, check batteries and contacts. Store in a dry, sheltered place. Periodic sharpness checks and bolt tightening can improve longevity.
When Not to Use an Electric Tiller
No‑till and broadfork alternatives
If your soil is healthy and you’re doing maintenance planting, consider no‑till practices. Layering compost, mulch or using a broad-fork aerates deeply without disturbing soil layers or organism life. Many gardeners transition to low‑till after building up fertility.
Established or small raised beds
For raised beds with established plants or sensitive roots, hand‑forking around roots or using a manual cultivator preserves structure and avoids damage. Electric tillers can over‑disturb and mix too intensely in these situations.
Conclusion
So there you go—a full, friendly walk‑through on how to prep garden soil with an electric tiller. We covered planning and safety, step‑by‑step soil tilling, amendment blending, pro tips, and when it’s better to skip the tiller in favor of gentler methods. When you set up your electric tiller carefully, work with your soil’s moisture, and follow these steps, you’ll transform your garden bed effortlessly. Watching the tines carve through the compact soil filled me with pure gardening excitement—it’s rewarding in every sense. Good luck, and may your garden thrive beautifully with earthy magic!
Please read more about the best electric tiller.
FAQs
Can I use an electric tiller in heavy clay soil?
Yes—especially corded models with deeper tine depth. But it’s best to do multiple light passes at different angles, clear out rocks first, and mix in compost or sand to gradually loosen clay textures. Community gardeners confirm that shallow repeats work better than forcing one deep pass.
What’s the best time of year to till the garden?
Ideal times are early spring (after the last frost) and fall before winter. These seasons typically offer moderate moisture—soil is workable but not soggy or too hard.
How deep should an electric tiller till?
Most common depth ranges are 6–8 inches for initial passes, then shallower for mixing amendments. Use transport/wheel settings appropriately; deeper depths are for breaking ground, while 2–3 inches is perfect for topsoil mixing.
Will tilling harm beneficial insects or soil organisms?
It can, especially if you over‑till repeatedly. To support soil life, limit mechanical disturbance, add organic mulch, and avoid deep tilling after initial prep. Leaving some untouched areas helps preserve microbial and worm activity.
Should I choose corded or cordless electric tiller?
-
- Corded: better for larger beds or tougher clay soil—constant power and deeper tilling capability.
- Cordless: lighter and more mobile—great for small beds or lighter soil—but limited run time and less torque. Choose based on garden scale and soil conditions.